Showing posts with label Snacks. Show all posts

Friday, April 23, 2010

Spring Pairings

Things that go together:
  • DH and I
  • Audrey Hepburn and that little black dress
  • Simon Cowell and Paula Abdul
  • Sarah Palin's speeches and my migraine
  • Leo and Kate (not to be confused with Jon and Kate - blech, now I have a bad taste in my mouth!)
  • Strawberries and cream
  • Chocolate and coffee
... apples and potatoes?

That's right. Apple, meet Potato. You may not believe me, but I think the two of you are going to get along just fine.
Bonjour, you sexy thing ...

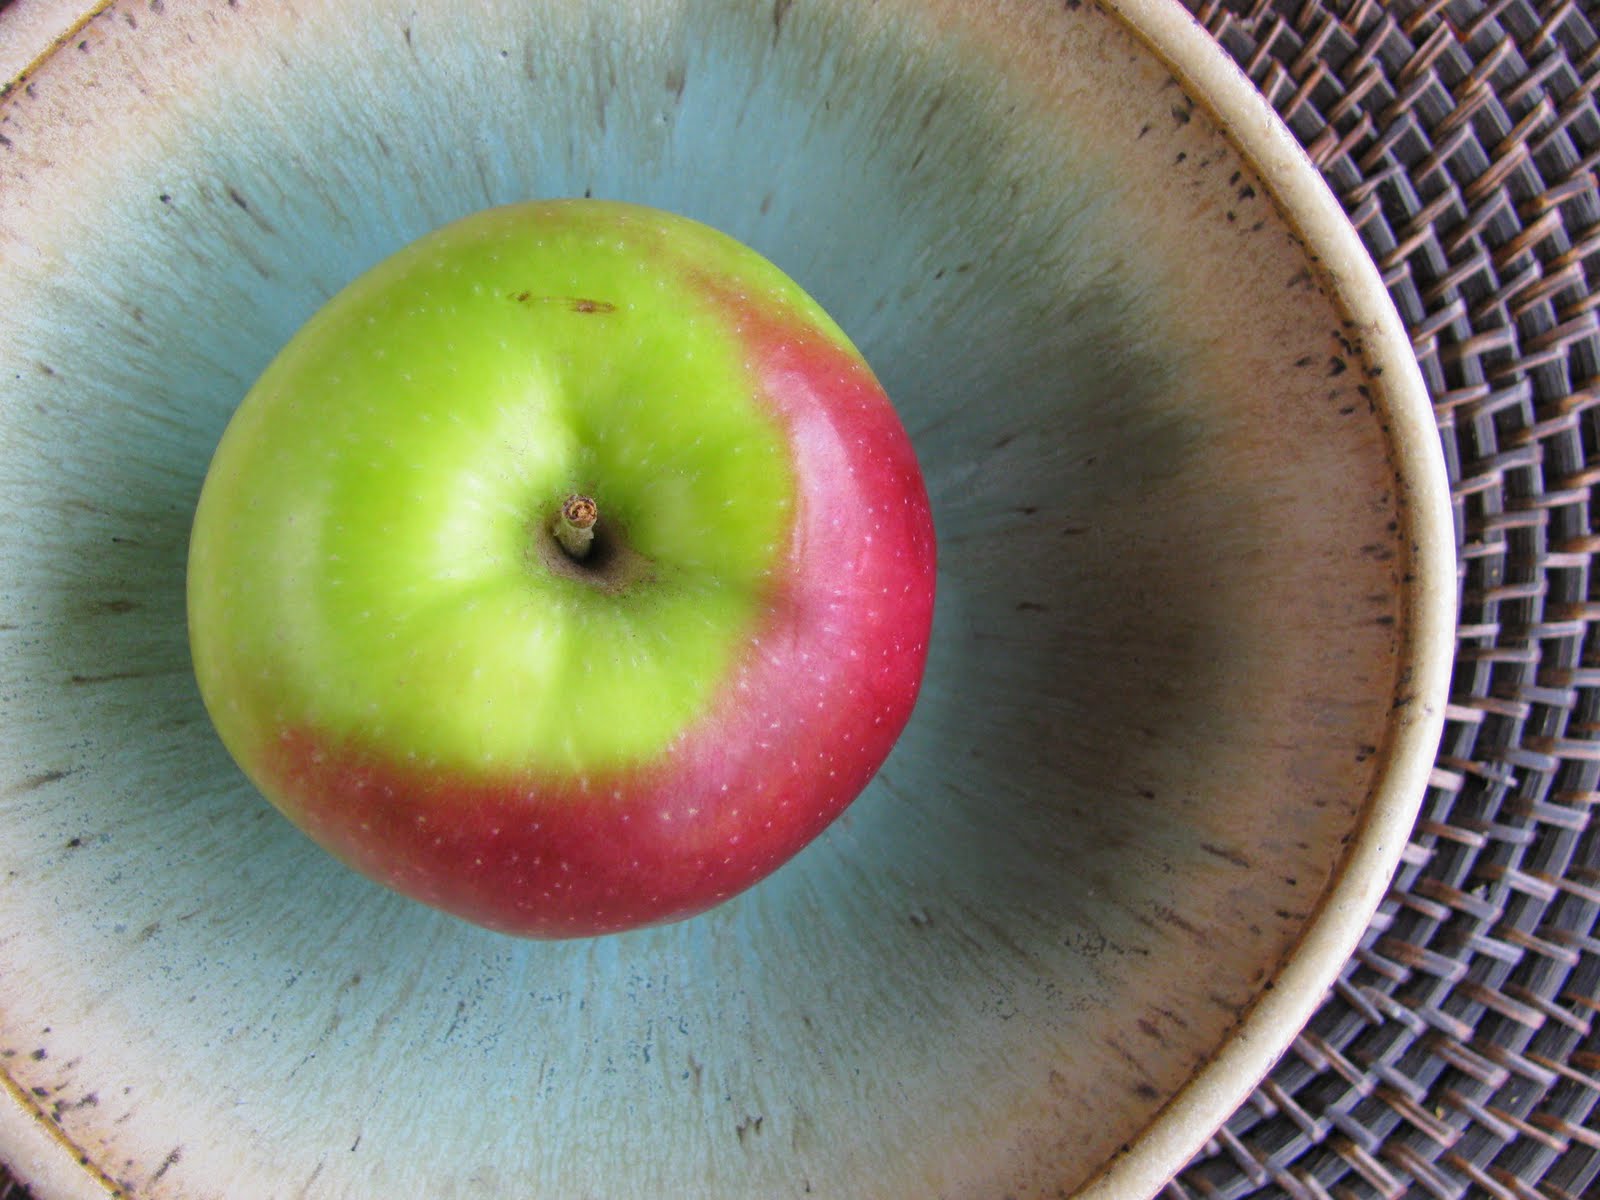
Oh excuse me, you're Scottish you say, not French? I beg your pardon, lassie ...

So you hail from the MacIntosh clan, eh? Well, if I may be so bold, you young lady, are a fine specimen.

*rolling eyes at my pathetic juvenile humor*

And that, folks, is an example of why I will never go into acting or comedy.

I have to remind you, dear readers, that I don't even like apples much. But the idea of having it in a savory snack was really appealing. I simply had to give this recipe a whirl. Plus, the pictures on this person's blog made the dish look completely irresistible.

Apple-Potato Fritters (original recipe by Chocolate Shavings)
Makes 6 fritters


Ingredients:
1 apple, peeled and grated
1 large potato, peeled and grated
1 egg yolk
2 tbsp rice flour
2 tbsp Parmesan
Salt & pepper to taste
Canola oil for shallow frying

Method:
1. Combine the grated apple and potato, then spread them out on thick paper towels for all the moisture to drain out.

2. Mix the apple-potato mixture with the rest of the ingredients, and stir till everything comes together.

3. Heat a few tbsp of oil in a frying pan till shimmering.

4. Drop a heaping tbsp of the batter into the hot oil and flatten the top. Crisp on both sides, then serve with cool sour cream.

Verdict: Crispy goodness that was a cinch to put together. Makes a great snack for DH when he comes home from work. And of course, since I'm the dutiful wife, I had to give him company and partake of my share - I simply had to, I tell you! Funny how I'm humming just thinking back to the taste of this fritter in my mouth. Omnomnom!

Oh, and speaking of strange things that go together - well, there's these two ...

Bashaar: "Erm, excuse me, but I believe I may have soiled myself Mummy."
Ozzy: "F@#$ing hell, not again! Mummy, you need to attend to this kid pronto!"

Sunday, March 28, 2010

Morning Reflections

Parmesan-Thyme Shortbread. A small snack that packs a punch.

It takes a baby to make you realize the luxury of having a peaceful night's sleep and waking refreshed in the mornings. But I'm not going to whine about that. This post is about appreciating the positive side of everything - like how much I enjoy getting the chance to watch the sunrise every morning, while holding my precious bundle close to my heart.

Magical, no?

Nothing quite beats the serenity of a quiet morning. It's times like that when the oddest, most random thoughts tend to pop up in my head. Things like how much I love Ina Garten's kitchen, or why is B's hair growing in patches, or when am I ever going to have time to go get that pedicure my feet so desperately need, or how I cannot stand Kara Dioguardi from American Idol ... and that sends me spiraling into all kinds of negative emotions towards that show! How much does this season suck?! Even my beloved Ellen can't save it from the lack of talent it's suffering from.

Thyme - such a dainty little thing, isn't she?

This morning I started wondering what to do with the whole bunch of thyme I bought from the grocery store recently. I'm waiting to move into my next home before I start growing my own thyme, because it's ridiculous to buy an entire bunch from the store when you only need a few sprigs! It's a lovely herb, but doesn't get used at all in my regular Pakistani cooking. I decided that it was time I started venturing into snack recipes, and perhaps steer clear of desserts for a while (huh, we'll see how long
that lasts!). That's how the idea for this recipe was born, and luckily, Janice from Have Recipes - Will Cook had the perfect, easy recipe for me.

Parmesan-Thyme Crackers
(find original recipe here)

Makes about 20 crackers

Click here for printable recipe

Ingredients:
1/2 cup (1 stick) butter, room temp
Approx 1 cup freshly grated parmesan
1.5 tsp minced fresh thyme
1/2 tsp kosher salt
1/2 tsp freshly ground black pepper
1 1/4 cup all-purpose flour

Method:
1. In the bowl of a stand mixer fitted with the paddle attachment, cream the butter.

2. Turn the mixer to low, then add the parmesan, thyme, salt and pepper. Mix until combined.

3. Add in the flour and mix till it all comes together as a soft dough.

4. Place the dough onto a lightly floured surface and press into a ball. Then roll it out into a 9-inch log. Wrap it in plastic wrap and put it in the refrigerator for at least 30 mins, or up to 4 days.
Must. Stop. Thinking. Naughty. Thoughts. My parents read this blog - dammit!

5. Preheat oven to 350 F. Line a baking sheet with parchment paper. Cut the dough into 3/8 inch thick rounds and place them on the baking pan. Bake for 22 mins or until very lightly browned. Rotate pan once during baking. Cool and serve at room temp.

Verdict: The hardest part was stopping myself from tearing into these adorable crackers as soon as they came out of the oven! The smell of the buttery dough, mixed with parmesan and fresh thyme, as it was baking just drove me to distraction. These have a strong, moan-inducing flavor, and beautiful texture, and work perfectly as an afternoon snack when you're craving something savory. Be aware that these aren't low-fat, even though they're tiny, and eating 10 of them in a row will come back to haunt you when next you go jean-shopping (I did, and it wasn't pretty).

Friday, November 13, 2009

Have A Hearty Brunch

Restaurant chefs hate the brunch shift. They party hard the night before and probably hate the rest of us "civilians" for ruining their Sunday morning lie-in. If you've ever read Anthony Bourdain's Kitchen Confidential, you'll remember how he spilled the beans on what not to order for brunch at a restaurant unless you know the chef (seafood mainly). Now, as much as you know I love Tony, I'm not going to let his cynicism ruin my brunch experience. It's a great way to start a lazy Sunday, when family and friends are over for a visit. I like cooking brunch, because I can incorporate a lot more savory and heartier items into my menu - plus I get more time in the mornings to cook it. Then again, my favorite brunches were in Las Vegas when DH and I went there for vacation one year. Man. Oh. Man. It was hedonistic. I have fond memories of waking up late at our hotel after a night of indulgence and pleasure and hopping all over the Strip, then making our way down to the hotel's ginormous brunch buffet - where we easily spent a good hour or two, devouring our way through plate after plate of carby goodness. DH even became firm friends with the omelette guy.

But Vegas is very far from my little town in Connecticut, and a girl can't live on memories alone. So, once in a while, I try to re-create that feeling of lazy indulgence at home, by whipping up a hearty brunch whenever my family pops over for a weekend visit. Lately, biscuits have become one of my favorite brunch items. They're surprising easy to make (although a bit messy) and go really well with all kinds of eggs. Like these craggy little bundles of cheesiness - which claim to be like the ones you get at Red Lobster, but I personally think they're even better!Easy Cheddar Biscuits (this recipe is all over the web, but I found it here)
Makes 1 dozen

Click here for printable recipe

Ingredients:
2.5 cups Bisquick baking mix
3/4 cup cold whole milk
4 tbsp (1/2 stick) cold butter (cut into cubes)
1/4 tsp garlic powder
1 heaping cup grated cheddar cheese

To brush on top:
2-3 tbsp melted butter
1/4 tsp dried parsley flakes
1/2 tsp garlic powder
Pinch of salt

Method:
1. Preheat oven to 400 F.

2. Combine Bisquick mix with the cold butter - cut it in using a pastry cutter or a large fork. Don't overmix; you want to see some pea-sized chunks of butter in there.

3. Then add the cheddar cheese, milk and garlic. Mix by hand until just combined.

4. Drop approximately 1/4 cup portions of the sticky dough onto a baking sheet lined with parchment paper.

5. Bake for 15-17 mins or until the tops turn golden brown. Take the biscuits out of the oven and immediately brush them all over with the mixture of melted butter, parsley flakes, garlic powder and salt. Serve right away to your eager and hungry brunch crowd.

Verdict: These really are super easy. And they disappear pretty quickly when you serve them fresh from the oven. I love the cheesy, buttery smell that wafts through the house as these bake in the oven - I think that's the perfect smell to bring everyone to your table on Sunday morning! I did feel like a cheat, using a baking mix, but it's really convenient and quick, considering you have a bunch of other things you need to cook that morning. And it's a no-fail recipe in my books, erm, unless you forget about them in the oven. So use a timer, would ya?!

This recipe is going straight to Meeta's Monthly Mingle: Brunch event. I'm always looking out for great brunch ideas, so can't wait to see what the others cook up.

Ozzy enjoying his brunch. My poor plant - I have sacrificed thee for the digestive needs of my kitty.

One last thing, dear readers. Please check back here on Monday, Nov 16th, to find out about my new blogadventure with Debby of A Feast For The Eyes. That's also when you'll find out how you can have the chance to get your paws on The Pioneer Woman's uber-popular new cookbook (for free, I mean it) ! Mark your calendars, set your alarms, synchronize watches .... erm, you get what I mean!

Wednesday, October 14, 2009

Peaches To The Rescue

I was looking through my computer file where I store my food photos, and although I have a quite a pile that I haven't yet posted, the number that are actually any good is running low. Many of my day-to-day munchies are actually pretty drab to look at. I think I should get imaginative about how to display them in order to make them look appealing. I did, at one point, manage to set up an at-home studio - albeit a makeshift one. Much to my amusement/chagrin, it quickly became a haven for my Ozzy.
He is such an attention hog sometimes.

Now all I need to do is convince him that he needs to stay away from little contraption, then figure out a way to pretty it up with different colored backgrounds. Or should I just use white posterboard/chart-paper on the inside? Any ideas?

When I came across this recipe for Peach Brown Butter Bars on Tennessee Locavore's blog, I knew it would be lip-smackingly good, but when it came to looks, I foresaw a whole lot of beige and brown. Not exactly the photo-op I was hoping for. But then I dug deeper with my camera lens, and discovered that there's beauty in brown. It is, after all, the color of caramel ... something that's brought me to my knees many times before!
Peachy Keen Brown Butter Bars (original recipe found here)
Serves 8

Click here for printable recipe

Ingredients for the crust:
7 tbsp butter, melted
1/3 cup sugar
1/4 tsp vanilla extract
1 cup + 1 tbsp all purpose flour
Pinch of salt

Ingredients for the filling:
1/2 cup sugar
2 large eggs
Pinch of salt
1/4 cup all purpose flour
1 tsp vanilla extract
1/2 cup butter (1 stick)
4 peaches, peeled and sliced

Method:
1. Preheat oven to 375 degrees F. Using a little butter, grease an 8" x 8" baking pan, then line with parchment paper (both ends should hang out - to use as handles later!) and butter that too.

2. For the crust: Using a rubber spatula, mix the sugar, butter and vanilla in a bowl. Then add the flour and salt. Fold the dry ingredients in completely, till a dough forms.
3. Transfer the dough to your baking pan. Using your fingers and knuckles, press the dough so that it's evenly distributed across the bottom of the pan.
4. Bake for about 15 minutes, till crust is golden. Put pan on a rack and cool slightly.

5. For the filling: Melt the butter in a saucepan over medium heat. You want to cook it until it's a deep brown - should take around 5-10 mins. Do NOT walk away to watch a clip of The View on your TV! The butter may burn, and then how will you face Barbawa Wawa again?!

6. Whisk eggs, salt, sugar and vanilla in a bowl (or in your fancy schmancy KitchenAid stand mixer). Add flour and whisk until smooth. Very slowly drizzle in the browned butter until smooth and completely blended.
7. Arrange two layers of peach slices on the pre-baked crust.

8. Pour the brown butter mixture carefully over the fruit. Bake bars for 40-45 mins till golden and puffed. Cool bars completely on rack, then cut into square and serve. Try a couple out for yourself first - quality control, of course!


Verdict: Browning the butter was a small challenge, because I have just about the same patience as a 5 year old in the kitchen. But it was so worth it! You could definitely taste the nuttiness and warmth of the butter in these bars. By the way, that simple shortbread crust was divine. My only regret is that my peaches were not as sweet as I wanted them to be. I'll definitely make this again with the sweeter, golden peaches, rather than the white flesh ones. It didn't seem to make a difference to my friends though, who happily gobbled up these little bites of sunshine in one go. Great with tea or coffee. Oh, however, if you're feeling selfish, you might want to stash away the corner pieces for a personal midnight snack - those slightly darkened bits are my favorites.
Mmmmm. crispy, curly edges with a pillowy soft center.

If it's not too late, I think I'll submit this recipe to Meeta's Monthly Mingle: High Tea event, hosted by Aparna over at My Diverse Kitchen. I think these decadent little bars would make even the Queen lose her composure.

Thursday, October 8, 2009

As Easy As Apple Tart

I've got to tell you, dear readers, I always thought I was above peer pressure, but it turns out that I'm not! Luckily, this time when I chose to give in, it ended in a surprisingly good result. I'm talking about apples. They're everywhere, aren't they? And all of you out there in the foodie blogosphere are doing such wonderful things with them - I'm so impressed! The apple is a humble fruit, with a rich history. Why do you suppose people think the apple was the forbidden fruit that caused Adam & Eve to be thrown out of heaven? I would've thought it was something more exotic, no?! Nonetheless, apples never really appealed to me. Maybe it was a simple case of too much supply versus demand? Growing up, it was one of those fruits that was omnipresent, no matter what the season, and it still is. Mum was forever trying to get me to eat more of it. And when people tell you that "an apple a day keeps the doctor away", well, that just makes it sound like medicine. Blech. And I, for one, have a thing for cute doctors, so why would I stuff myself with apples?!
But I'm a sucker for good marketing. When I entered my grocery store the other day, some magical little elf had turned it into an apple orchard wonderland! Bushels and baskets, overflowing with at least eight different varieties of apples, were scattered everywhere. A veritable cornucopia, if I may (I've always wanted to use that phrase - me smart). So I caved. Bought myself a bunch of Golden Delicious apples and took them home, after which I began scouring the net for the perfect,
easy apple dessert recipe. There are so many of you creative foodies out there, that I was overwhelmed by the choices I had! Finally, I simply settled for one that was a cross between a tarte fine by Dorie Greenspan and an apple tart by Ree, my favorite Pioneer Woman!
Elegant Apple Tart (tweaked from this recipe by The Pioneer Woman)
Serves 4-6

Click here for printable recipe

3-4 firm, sweet apples, preferably Golden Delicious
Squirt of fresh lemon juice
1 sheet frozen puff pastry (I use Pepperidge Farm), slightly thawed
1/2 cup brown sugar
1/4 tsp salt
2 tsp milk or heavy cream
1/4 cup apricot preserves/jam, for glazing
1-2 tsp granulated sugar, for sprinkling

Method:
1. Preheat oven to 400 degrees F. Line a baking sheet with parchment paper.

2. Peel, core and slice the apples. Pour over some lemon juice right away so that they don't turn brown. Mix well with the brown sugar and salt. Keep aside.

3. Unfold the puff pastry sheet. Slice it into thirds or in half. Arrange the apple slices in a pattern that you like, on top of each piece of puff pastry. I like the vertical, overlapping version.

4. Brush the milk/cream over the exposed edges of the puff pastry. Sprinkle the granulated white sugar over the whole thing, and pop into the oven for about 15-25 mins - just keep an eye on it, so that it doesn't burn.

5. In the meantime, warm up the apricot preserves/jam with a little bit of water on the stove, so that it becomes spreadable. Once the tarts come out of the oven, liberally shmear them with the apricot glaze. Cool for 5 mins and serve with whipped cream or ice-cream for dessert. OR as the star of your high tea with the girls!

(Tip: If the apples on your tart did not caramelize as much you wanted them to, go at them with your handy-dandy kitchen torch - the same one you use for creme brulee)

Verdict: DH liked this tart way more than I did. It's very delicate and oh-so-french, which I love. Also, it's easy enough for me to make on a whim. So although I'm still not an apple junkie, I will give this tart a thumbs up, and recommend it to anyone. Perfect for a chilly fall afternoon, when you need something warm, fragrant and homey to chomp on. Plus, when has anything with puff pastry ever turned out terrible?!
Oh. My. Lord. Sticky, caramely, fruity goodness. Apples, thou have redeemed thyself.

Ozzy, snoozing in a warm patch of sunlight on a chilly fall morning, right next to my computer chair. He better be careful because one of these days I'm gonna forget he's there, and roll over him ... yikes, scary thought! I have to look all around my chair before I even budge!

Will be sending this recipe to Meeta's Monthly Mingle - High Tea Treats event, hosted by the lovely Aparna from My Diverse Kitchen.

Tuesday, September 1, 2009

Eat What Your Mama Gave Ya


Oh, to be efficient! To be a multi-tasker! To be like Ree from The Pioneer Woman or Donna-FFW from My Tasty Treasures ... or any of you millions of superwomen out there (including my mom)! I admire thee. For the simple reason that I am sadly not like thee. Where many of you can juggle family, cooking, blogging, shopping, entertaining, and chores (while still looking fabulous) all at the same time, I fail miserably. I have one cat, one DH, and a small apartment - any sane person would think it would be a piece of cake to handle all three. For most of you it would be, but me, I let myself get bogged down by the details. And TV, I won't lie. But I think this month of Ramadan has thrown me off my schedule a bit - all that fasting from dawn to dusk has reduced my brain to a ... uhhhh ... hmm .. see what I mean?! I've run out of words just in my first paragraph *sob*.

To self: Pull yourself together, woman! You have a blog to write!

So dear readers, that ridiculous rant was basically my justification for not blogging as much as I've been wanting to this past week. There's been a lot of stuff going on. DH has been pretty busy with work-related issues, and when he comes home, we tend to discuss them over and over, because that's what we do. My little monster kitty Ozzy has been up to new tricks - he's figured out how to get
inside our living room couch, through the bottom. Y'know how they have this really thin cloth covering the part underneath your couch? Well, he rips a hole in one corner and slips inside, and basically runs around the inside of the couch ... and then forgets how to get out. *rolling eyes* Not the smartest cat in the world. In addition, I've been busy with a little experiment of my own, which I think has now come to an end, so I can get back to you all.

Today I have a recipe that's very specific to a region in India, called Hyderabad. My mum's entire family is very rooted in those Hyderabadi traditions (even though they're all now Pakistanis - it's confusing for some, I know, but just go along with me). Ever since I can remember, every Ramadan, my mum would make these amazing fried squares of dough, stuffed with a tangy, spicy mixture of ground beef called
lukhmi (pronounced look-mee).
This would be the treat my brother and I would look forward to every Ramadan, because that's what we wanted for Iftari (when it comes time to break the fast). And whereas I have moved forward, and expanded my repertoire of Iftari goodies, my little brother is still stuck in some sort of time warp, where he refuses to eat anything else but
lukhmi for Iftari. The boy can polish off an entire pile of these babies. These are my mom's specialty, and for some reason I never thought I'd make them myself, because they're just so Mom, y'know! This is what she does. And the good Lord has given me better sense than to compete with my mom. But, this Ramadan, I decided it was high time to tackle this recipe. For one thing, I had to share it with DH because he'd never had these lukhmi before, and secondly, I needed to know how to make these so that I can pass the tradition on - spread the love!

Lukhmi (Fried & Stuffed Parcels - the easiest recipe Mom's ever given me!)
Makes approx. 8-10 pieces

Click here for printable recipe

Ingredients for the dough:
1 cup whole wheat flour (atta)
1 tbsp all-purpose white flour (maida)
1 tbsp course semolina (sooji)
Up to 1 cup whole milk
1 tbsp oil (plus extra for deep frying)

Ingredients for the ground beef mixture (my version):
1/2 lb ground beef
1-2 tbsp oil
1 small onion, thinly sliced
1 tsp salt
1/2 tsp red chilli powder
1/4 tsp turmeric
1/2 tsp ground cumin
1 small chopped green chile
Ground black pepper
1-2 limes
Chopped cilantro

Method:

1. First make the dough: Combine the dry ingredients in a large bowl. Then add about half the milk, and start kneading the dough. Add more milk as needed. You should end up with a soft, pliable, but not too sticky ball of dough. Knead well. Pour about a tbsp of oil onto the dough and mix it in briefly. Prick the dough a few times with a fork, all over, so that the oil sinks in. Then put it in an airtight container and leave in the fridge for at least 1/2 an hour.

2. For the beef mixture: Heat up the oil on medium-high heat and saute the onion till golden brown. Plop in the ground beef, green chile, salt, chilli powder, turmeric, ground cumin and black pepper, then cook this off. Brown the meat well, and make sure that you evaporate as much of the liquid as possible (stirring helps). Finish off with mixing in chopped cilantro and the juice of 1-2 limes (you want to really taste that tanginess in each bite). Mix, then turn off the heat and set aside to cool.

3. Start assembling the lukhmi about 45 mins before you need to serve them. The refrigerated dough needs to be kept at room temperature for about 15 mins before you start rolling it out.

4. Separate the dough into two pieces (easier to roll out). Dust your surface with some AP flour, and roll out the dough till it's this thin (see below!). Use more AP flour if the dough sticks to your rolling pin or your surface.
That battered old rolling pin is also something my Mom gave me - it's seen better days!

5. Place 1 heaping tsp of the beef mixture for each lukhmi (it's a bit like making fresh ravioli). Put this in the middle of the bottom-half of the dough you've rolled out. Then you use the top-half of the dough to cover these. Push out any air pockets before you pinch close the dough all around, tightly! Separate but cutting with a knife. Pretty it up all you want - I was lazy, so didn't. Set aside under a damp cloth, as you make the rest of the lukhmi.
6. Heat up your frying oil on medium-high till it's pretty hot (sorry, I don't have a thermometer). The idea is that as soon as you put in one lukhmi, it should start bubbling immediately and rise to the surface. Keep dousing the top that floats up with hot oil, so that it fluffs up. Once golden brown on both sides (about 1 min or less), drain on a paper towel and continue with the rest. Serve immediately with ketchup or your favorite chutney!


Verdict: Crispy on the outside, yet soft and chewy once you bite down, and bursting with flavor from that tangy, spicy ground beef inside. The key is to make sure it's not too full of the beef, because then they don't fluff up like this. DH and I open our fast every day with some luscious Medjool dates, a glass of cold milk mixed with rose-water syrup (called Roohafza in most Indian/Pakistani stores - that's what gives the milk that baby-pink color, but I assure you, it tastes nothing like Pepto-Bismol! It's really quite delicious), and sometimes a platter of these delicious fried lukhmi. I think they're relatively easy, and the best part is, they taste like Mom's! Mission successful.

Monday, August 24, 2009

Ramadan Nibbles

It's that time of year again for me, dear readers. I think it's great how many people in the West now know about fasting in the month of Ramadan. For me personally, Ramadan is a time to be more conscious/aware of our relationship with God and with the people around us. To put in that extra effort towards becoming a better person, and being truly appreciative for everything positive in our life. Showing love, generosity and charity to those in need plays a major role. It's a time to set bitterness, jealousy and hatred aside for good, and start afresh. Sort of like rebooting your internal spiritual computer once a year! And yes, the fasting from sunrise to sunset is supposed to help with that. I say "supposed" because I can see how it can work a bit like meditation - you shut out the material world and focus inwards. Honestly though, that's easier said than done. Especially if you're a working individual in this part of the world. Here, a job is a job, and there's no excuse for you not performing a 100% at work. But I suppose that's the test. If it was easy, there wouldn't be much of a point to the whole thing!

The part that many people end up focusing on, however, is the food. It's like when something you took for granted is taken away from you, it's all you can think about! I confess to being guilty of that many a time. But a big part of what makes Ramadan fun is getting together with family and friends every weekend, and cooking the highly-anticipated Iftar (sunset) meal together. This is my very first Ramadan when I'll actually be at home, instead of working long hours at an office somewhere - and I couldn't be happier! I have all the time in the world to plan out what variety of little bites (it works somewhat like tapas) I can prepare for DH and I for the Iftari. Then there's dinner too, which comes later, but is obviously lighter fare than on normal days) Here are a couple of new items that I've incorporated into my Iftar menu this year; they're quick and easy and pretty darn fabulous!

Hummus (got this great recipe from The Sassy Foodie)
Serves 6

Ingredients:
1 medium can chickpeas, washed & drained
3 tbsp tahini (sesame) paste, or to taste - you might find this in the "international" section of your grocery store
2 garlic cloves
Juice of 1 or 2 lemons
Salt and pepper
Extra virgin olive oil (about 4 tbsp)
Sprinkle of hot paprika and ground cumin

Method:
Dump the chickpeas, tahini paste, garlic, lemon juice, salt and pepper into a food processor. Start to blend, and pour the olive oil in a thin stream through the spout, till the mixture inside reaches a smooth paste-like consistency. Taste for salt, pepper & lemon. You can even add more tahini if that's what you want.

Take this entire mixture and spread it out in a circle on a plate, using the back of a spoon. Make a fairly wide indentation in the middle. Sprinkle all over with paprika and ground cumin (or in a pretty pattern if you have the patience). Just before serving, pour more extra virgin olive oil into the indentation. Serve with warm pita bread.

I've been seeing fresh figs in the grocery store lately, and have to grab a bunch every time, even though they are a bit pricey. When I was a kid growing up in the Middle East, we used to get these gigantic black figs once a year (about the size of my kiddie fist), and they were a real treat. My dad and I adored them. So eating these small ones now are the next best thing, and bring back lovely memories. I just eat them as is usually, but thought I'd change things up a bit this time.

Soft, dark and mysterious on the outside ...

Ruby-red and bursting with sweetness on the inside! You eat the whole thing, skin n' all.

Fun With Figs

Ingredients:
Fresh figs, any kind
Thick Greek yogurt OR ricotta cheese OR mascarpone cheese
Honey
Chopped pistachios

Method:
Cut each fig in half, and place them pretty side up on a platter. Put a dollop of yogurt or cheese on each half. Drizzle lightly with honey. Sprinkle with chopped nuts. Then pop the whole thing into your mouth and let the juices flow! Nature's candy, folks.


More delicious bite-sized recipes to come. It's only been 3 days of fasting so far - 27 more to go, so I better keep cranking out more foodie ideas. A happy and healthy Ramadan to all!

These recipes will be going to Lubna over at Kitchen Flavors, who is currently hosting Joy From Fasting To Feasting (Season II).

Thursday, August 13, 2009

Zucchini Snack Attack

Before I get to the recipe, I wanted to talk about family - parents and siblings in particular. Mine just left after an all-too-brief visit over the weekend. And I've been completely spoiled! I didn't wash a single dish or lift a finger to clean the house the whole time they were here. No siree, not while Dad the cleaning guru was around. Oh, I'd made a few goodies for them and scoured the house clean before they arrived, but once they got here, I turned into a diva. And God bless 'em, they encourage it. Even the kid brother lent a helping hand now and again, hallelujah! It must have something to do with the old adage, "Absence makes the heart grow fonder". Y'see, my family lives in Canada, so the most I see them is for a few days at a time, maybe twice or thrice a year. So when we do see each other, we try and cram as much affection and general family-togetherness into the visit as possible. DH also lucks out in a way, because my mom dotes on him, and weirdly enough, takes his side over mine on most matters. Don't ask me, I've no idea what that's all about! Although, if I had to guess, me thinks it boils down to the Pakistani tradition and culture, where the son-in-law is treated like royalty. Or it could simply be that DH has a way with older women, which he definitely does. Either way, we both get spoiled as a result of the parents visiting. Even Ozzy has more people to play with and hang around (like most kids, erm I mean, kitties, he completely ignores his mommy when there are other people around, ungrateful feline).
A simple, homey feast of a few childhood favorites, courtesy of Mom.

My favorite moments are the ones spent around the dinner table, laughing and giggling over family stories, enjoying tales of my brother's mad adventures, earnestly discussing world issues, all the while digging into a homemade feast, lovingly made by mom. My stove goes into overdrive when my mother is around. Being way more efficient than I am, she can prepare multiple dishes at the same time. Hyderabadi cuisine is her forte, and one that I don't even try to emulate, because really, what's the point?! I only disappoint myself because it never turns out as good as Mom's.

So my strategy is to try and add brand new recipes to my repertoire and make them my personal family favorites. And I think I found another keeper this week. One that I hope to be making several more times this season. Especially when the snacking demon attacks.

Zucchini Pakoras or Pancakes (thanks to the lovely Desiree of Life's Ambrosia for this wonderfully simply recipe. Please visit her site for more nummies.)

Serves 2-3 as a snack/appetizer

Click here for printable recipe

Ingredients:
1 large zucchini grated, excess water removed (To do this, after you grate the zucchini, put the grated zucchini into paper towels and squeeze to release the water)
1/4 cup freshly grated Parmesan cheese
1 cup panko bread crumbs
Sprinkle of ground nutmeg, about 1/8 teaspoon or less
1/4 teaspoon paprika
1 clove garlic, minced
1 egg
salt and pepper to taste
olive oil for shallow frying


Method:
1. Combine all ingredients in a bowl, except olive oil, and mix thoroughly. Using a heaping tablespoon form the mixture into 6-7 patties.

2. Heat 2 tbsp olive oil in a pan over medium heat. Once heated, add patties and fry until golden brown. About 3-4 minutes per side. You'll need to add more olive oil after the first 3 or 4 patties, because it does get absorbed. Drain on paper towels. Serve hot, while it's still crispy, with sour cream or ketchup or a thick raita.


Mmmmm - frying up to a lovely caramel brown, just the way I like it!

Verdict: One of those jump for joy moments when I put this in my mouth for the first time. Oh man, just crispy and caramelized on the outside, and so tender and chewy on the inside. The zucchini almost tastes like chicken when prepared this way! DH always asks for pakoras on rainy days, and I'm awfully pleased with this new find. It's easy to put together, and hits the spot around that crucial snacking time, around 4-5pm in the afternoon.

I'm also glad I discovered this recipe in time for Ramadan, the fasting month for us Muslims. The days are even longer than last year, so DH and I are gonna need something substantial for when we break the fast at sunset every day. Me thinks this will be a worthy addition to the menu. This isn't a Hyderabadi dish, but I'm from that region and it's going to feature on my Iftar table, so I hope that qualifies me to submit this to Mona's Hyderabadi Ramadan Food Festival.